近来,搭建了自己的独立博客站点,为了节省网络资源和提升访问体验,于是尝试开启HTTP/3协议支持,本文就记录一下开启HTTP/3的完整旅程。
一、为什么要开启HTTP/3
HTTP/3是HTTP协议的第三个主要版本,是由IETF(互联网工程任务组)制定的,基于QUIC协议的HTTP协议。QUIC是一个基于UDP的传输协议,由Google设计,旨在减少网络延迟,提高网络速度。
(一) 优势
- 减少网络延迟:
HTTP/3协议支持0-RTT连接,可以减少握手时间。 - 提高网络速度:
HTTP/3协议支持多路复用(传输层多路复用),可以减少网络拥塞。 - 提升网络安全:
HTTP/3协议支持加密,可以提高网络安全。
(二) 适用场景
- 高延迟网络:
HTTP/3协议适用于高延迟网络,可以减少网络延迟。 - 高拥塞网络:
HTTP/3协议适用于高拥塞网络,可以提升拥塞网络环境下的用户访问体验。 - 高并发场景:
HTTP/3协议能够在单个连接内,并行处理多个请求,且无队头阻塞问题。
(三) 浏览器支持
- Chrome:Chrome 73+ 开始支持 QUIC,但需要在 chrome://flags 中启用,Chrome 84+ 开始支持 HTTP/3。
- Firefox:Firefox 78+ 开始支持 HTTP/3。
- Edge:Edge 79+ 开始支持 HTTP/3。
- Opera:Opera 64+ 开始支持 HTTP/3。
- Safari:目前
尚未支持(截止版本:v17.4.1)。
二、如何开启HTTP/3
要开启HTTP/3,我们只需要选择一个支持HTTP/3的服务器,然后在服务器上配置HTTP/3即可。
(一) 可供选择的服务器
- Nginx:
Nginx 1.16.1+开始支持HTTP/3。 - Caddy:
Caddy 0.11.0+开始支持HTTP/3。 - Apache:
Apache 2.4.39+开始支持HTTP/3。
(二) 搭建Nginx服务器环境
由于我使用的是Nginx服务器,所以本文以Nginx服务器为例,记录一下开启HTTP/3的完整旅程。
为了方便服务部署,我们选择基于Docker容器的方式部署Nginx服务器。
1. Docker环境搭建
 # 安装yum-config-manager配置工具
yum -y install yum-utils
# 配置阿里yum源
yum-config-manager --add-repo http://mirrors.aliyun.com/docker-ce/linux/centos/docker-ce.repo
# 安装Docker
yum install -y docker-ce
# 启动Docker
systemctl start docker
# 设置Docker开机自启
systemctl enable docker
2. 安装docker-compose
# 下载docker-compose并放到/usr/local/bin目录下
curl -SL https://github.com/docker/compose/releases/download/1.28.6/docker-compose-linux-x86_64 -o /usr/local/bin/docker-compose
# 添加执行权限
chmod +x /usr/local/bin/docker-compose
# 查看docker-compose版本
docker-compose --version
3. 创建Nginx容器
- 创建
docker-compose.yml文件
version: '2'
services:
  nginx:
    restart: always
    image: nginx:1.25.1
    user: root
    container_name: nginx
    networks:
      - default
    ports:
      - "80:80"
      - "443:443"
      - "443:443/udp"
    volumes:
      - ./config:/etc/nginx
- ./html:/www- 启动Nginx容器
# 通过docker-compose创建Nginx容器
docker-compose up -d- 首次启动后,目录结构
├── config
│   ├── conf.d
│   ├── fastcgi.conf
│   ├── fastcgi.conf.default
│   ├── fastcgi_params
│   ├── fastcgi_params.default
│   ├── html
│   ├── koi-utf
│   ├── koi-win
│   ├── logs
│   ├── mime.types
│   ├── mime.types.default
│   ├── nginx.conf
│   ├── nginx.conf.bak
│   ├── nginx.conf.default
│   ├── scgi_params
│   ├── scgi_params.default
│   ├── uwsgi_params
│   ├── uwsgi_params.default
│   └── win-utf
├── docker-compose.yml
└── html
(三) 配置HTTP/3服务
配置HTTP/3完整服务,我们还需要一个TLS证书。我选择使用免费的Let's Encrypt签发的免费证书,但是Let's Encrypt签发的免费证书的有效期只有90天,不过我们可以使用acme.sh脚本来全自动更新证书。
证书生成的过程这里就不再赘述了。
1. nginx配置(config/confirm.d/default.conf)
下面配置中,用于开启http3的关键代码是第13、23和26行。
log_format  www_main  '$remote_addr - $remote_user [$time_local] "$request" '
                      '$status $body_bytes_sent "$http_referer" '
                      '"$http_user_agent" "$http_x_forwarded_for"';
log_format quic '$remote_addr - $remote_user [$time_local] '
                    '"$request" $status $body_bytes_sent '
                    '"$http_referer" "$http_user_agent" "$http3"';

access_log logs/access.log quic;


server {
  # quic and http/3
  listen 443 quic;

  # http/2 and http/1.1
  listen 443 ssl;
  server_name yunsin.top www.yunsin.top;

  # Add Alt-Svc header to negotiate HTTP/3.
  add_header Alt-Svc 'h3=":443"';

  server_tokens off;
  http3 on;
  http2 on;
  http3_hq on;
  quic_gso on;
  quic_retry on;

  # 证书
  ssl_certificate conf.d/keys/yunsin.top/fullchain.cer;
  ssl_certificate_key conf.d/keys/yunsin.top/private.key;
  ssl_trusted_certificate conf.d/keys/yunsin.top/fullchain.cer;

  # 配置赫尔曼密钥
  # openssl dhparam -out /etc/ssl/dhparam.pem 2048 //openssl 生成 2048 位的密钥
  ssl_dhparam conf.d/keys/dhparam.pem;

  # 禁止已经不安全的加密算法
  ssl_ciphers ECDHE-RSA-AES128-GCM-SHA256:ECDHE:ECDH:AES:HIGH:!NULL:!aNULL:!MD5:!ADH:!RC4:!DH:!DHE;

  # 缓解 BEAST 攻击
  ssl_prefer_server_ciphers on;

  # 禁止不安全的 SSL 协议,使用安全协议
  ssl_protocols TLSv1.1 TLSv1.2 TLSv1.3;

  # 缓存连接凭据
  ssl_session_cache shared:SSL:20m;
  ssl_session_timeout 60m;

  # 启用 HSTS,要求浏览器总是通过 https 访问
  add_header Strict-Transport-Security 'max-age=31536000; includeSubDomains; preload';

  # 禁止被外部网站 iframe
  add_header X-Frame-Options SAMEORIGIN;

  # 严格的 MIME 类型响应,禁止 MIME-sniffing 猜测资源类型
  add_header X-Content-Type-Options nosniff;

  # Public Key Pinning 对抗中间人攻击
  # 生成方法参考:https://lzw.me/a/public-key-pins-hpkp.html
  add_header Public-Key-Pins 'pin-sha256="xxxxxxx"; max-age=2592000; includeSubDomains';


  access_log  logs/www.access.log  quic;
  error_log  logs/www.error.log;

  location / {
    alias /www/yunsin.top/;
    index index.html index.htm;
  }
}

# 80 端口跳转到 https
server {
    listen 80;
    server_name yunsin.top www.yunsin.top;
    add_header Strict-Transport-Security 'max-age=31536000; includeSubDomains; preload';
    return 307 https://yunsin.top$request_uri;
}
2. 重启nginx服务
# 进入docker-compose.yml所在目录
cd /path/to/nginx
# 重启nginx服务
docker-compose restart
(三) 检验HTTP/3是否已成功开启
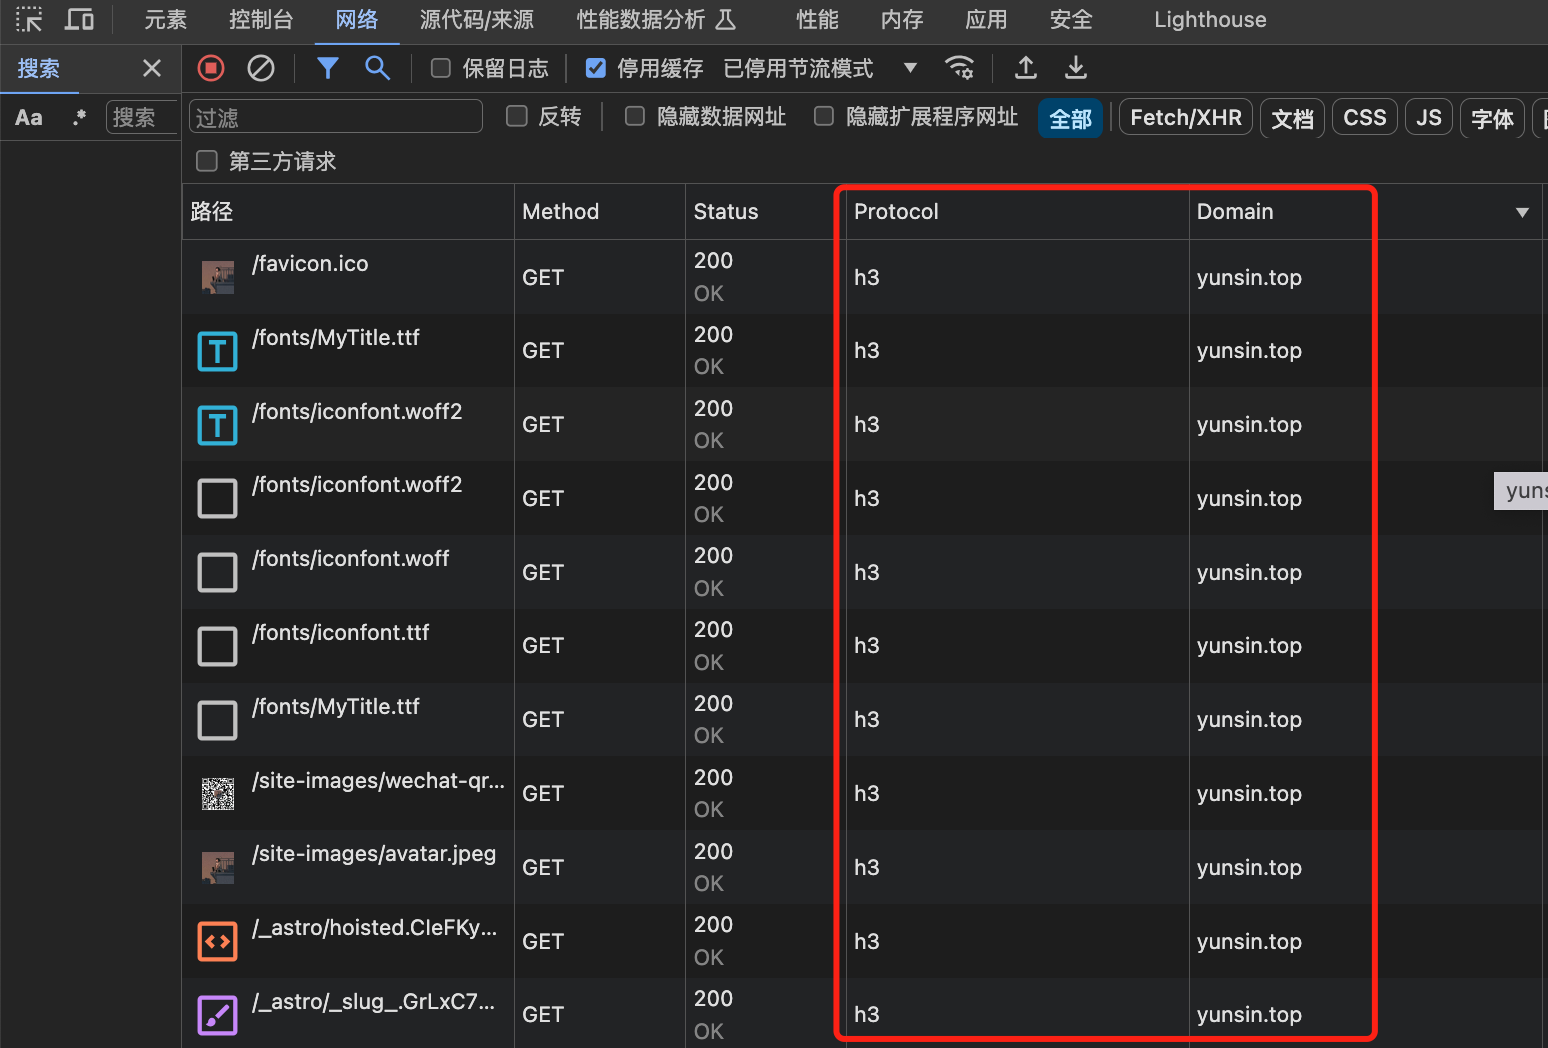
要验证网站的HTTP3是否已经成功开启,只需要挑选一个支持HTTP/3的浏览器访问你的网站,然后打开控制台查看网络面板中的Protocol列显示h3即表示浏览器与服务器之间通信已经使用了HTTP/3协议进行通信。
三、常见问题
配置没问题,服务也正常启动了,在检验的时候发现只用到了HTTP/2,没有使用HTTP/3协议!!!
原因1: 使用了代理,但是代理未支持HTTP/3
原因2: 服务端存在防火墙,防火墙只放行了TCP:443,未放行UDP:443端口
如果本地存在代理,无法验证,可以通过这个在线工具来验证网站是否已启用了HTTP/3。
总结
HTTP协议在近十年发生了很大变化,整体方向都是为了降低延迟、提升响应速度和网络利用率,下面我们从网络链接的角度来看看HTTP协议的改进:
- 在
HTTP/1.1中引入了keep-alive使得TCP链接可以被多个请求复用,解决了每个http请求都需要建立TCP链接的三次握手和断开链接的四次挥手的开销。 HTTP/2在链接优化方面主要引入了http多路复用,解决了HTTP/1.1同一个TCP链接上的HTTP请求都需要串行(HTTP队头阻塞)的问题。HTTP/3在链接优化方面,引入了基于UDP的QUIC协议,解决了TCP队头阻塞的问题。
现在是时候为您的网站开启HTTP/3支持了 ^_^
由于笔者的水平所限,文章可能存在不足和谬误,还请恳请大家批评指正。